Well I think it’s fair to say that autumn has arrived in my part of the world and, as the temperature continues to drop, we’re not too far off winter!
Many people don’t appreciate that winter is actually my busiest time of the year, as the changeable (and often challenging) weather gives much more interesting images than blue skies and fluffy white clouds. It’s also the season when I run the majority of my workshops, once again, for the very same reasons.
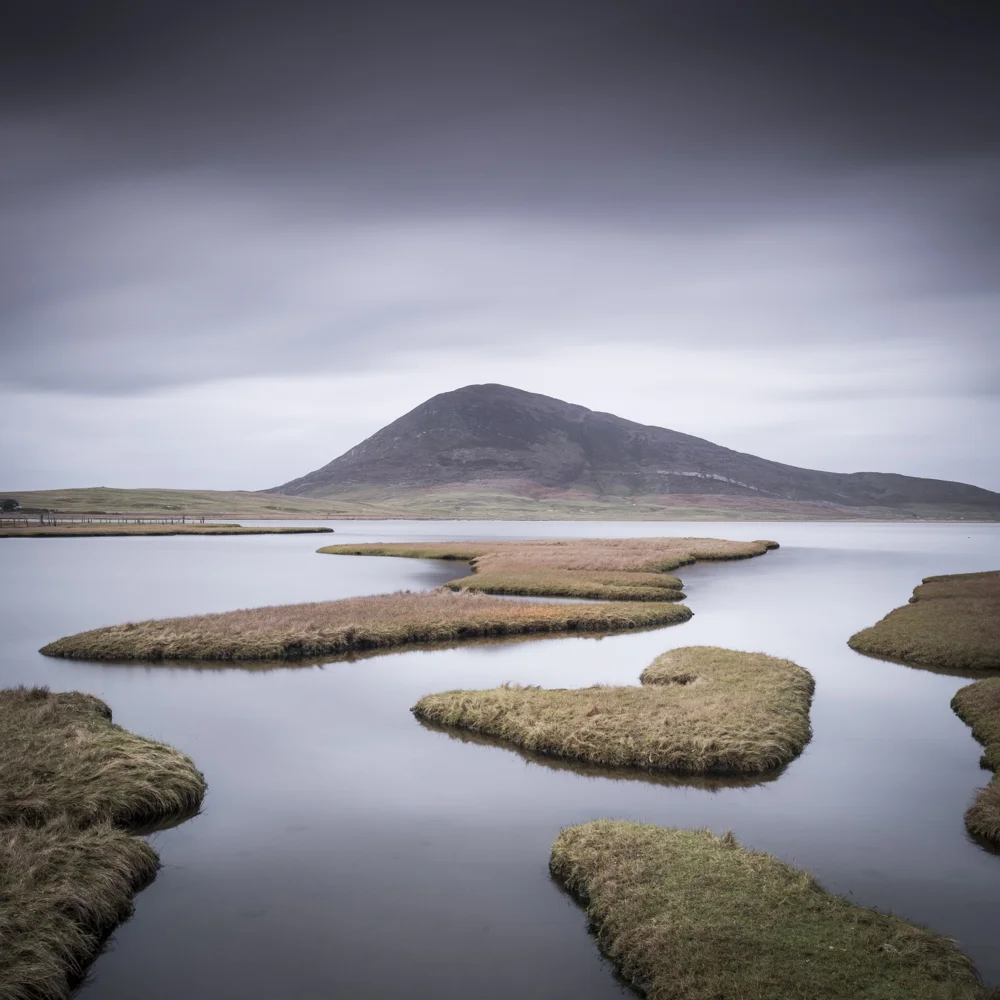
In fact I’m also just back from running a workshop in the Outer Hebrides, where I had a wonderful group who all enjoyed learning more about using filters, long exposures and how to make great compositions. We also looked at post-production techniques and how they might begin to develop their own person style.

Borve Beach, Harris, Outer Hebrides
Instead of getting a break after this intensive week, I instead was heading off to Venice, to capture some more stock images for a project that I’ll also cover in this newsletter.

San Marco, Venice from San Giorgio Maggiore
Before all my recent travels, I invested a lot of time over the summer on a totally new project, which was to equip my studio as a platinum palladium printing space. For those readers who don’t know what platinum palladium printing actually is, here’s a very brief history.
Platinum printing is a photographic process to produce black and white prints, which dates back to the 1870’s. Often, platinum and palladium are combined, and a liquid coating or emulsion is mixed before subsequently ‘painting’ this onto an art paper. When the emulsion is dry, a negative is placed on top of the paper and this is exposed to UV light to create an image, which is then developed in various chemicals before being washed and dried. Platinum prints exhibit a very delicate tonal range and the image sits more ‘in the paper’ than most other processes. The prints also can last up to 1,000 years and need to be seen to appreciate their aesthetic qualities.
This is a process that has seen somewhat of a revival in certain quarters since the 1970’s and I first came across it myself around 15 years ago.
What started this interest was the desire to produce something a little different for my own work and I was keen to see what printing them on platinum/palladium would produce. I’ve also been combining this old ‘alternative’ process with more modern techniques, by combining colour with the black and white of platinum palladium.
I have to say that I’ve been delighted with the results to date and have now sold out the first print limited edition using this technique. A photo of this first print is shown below.
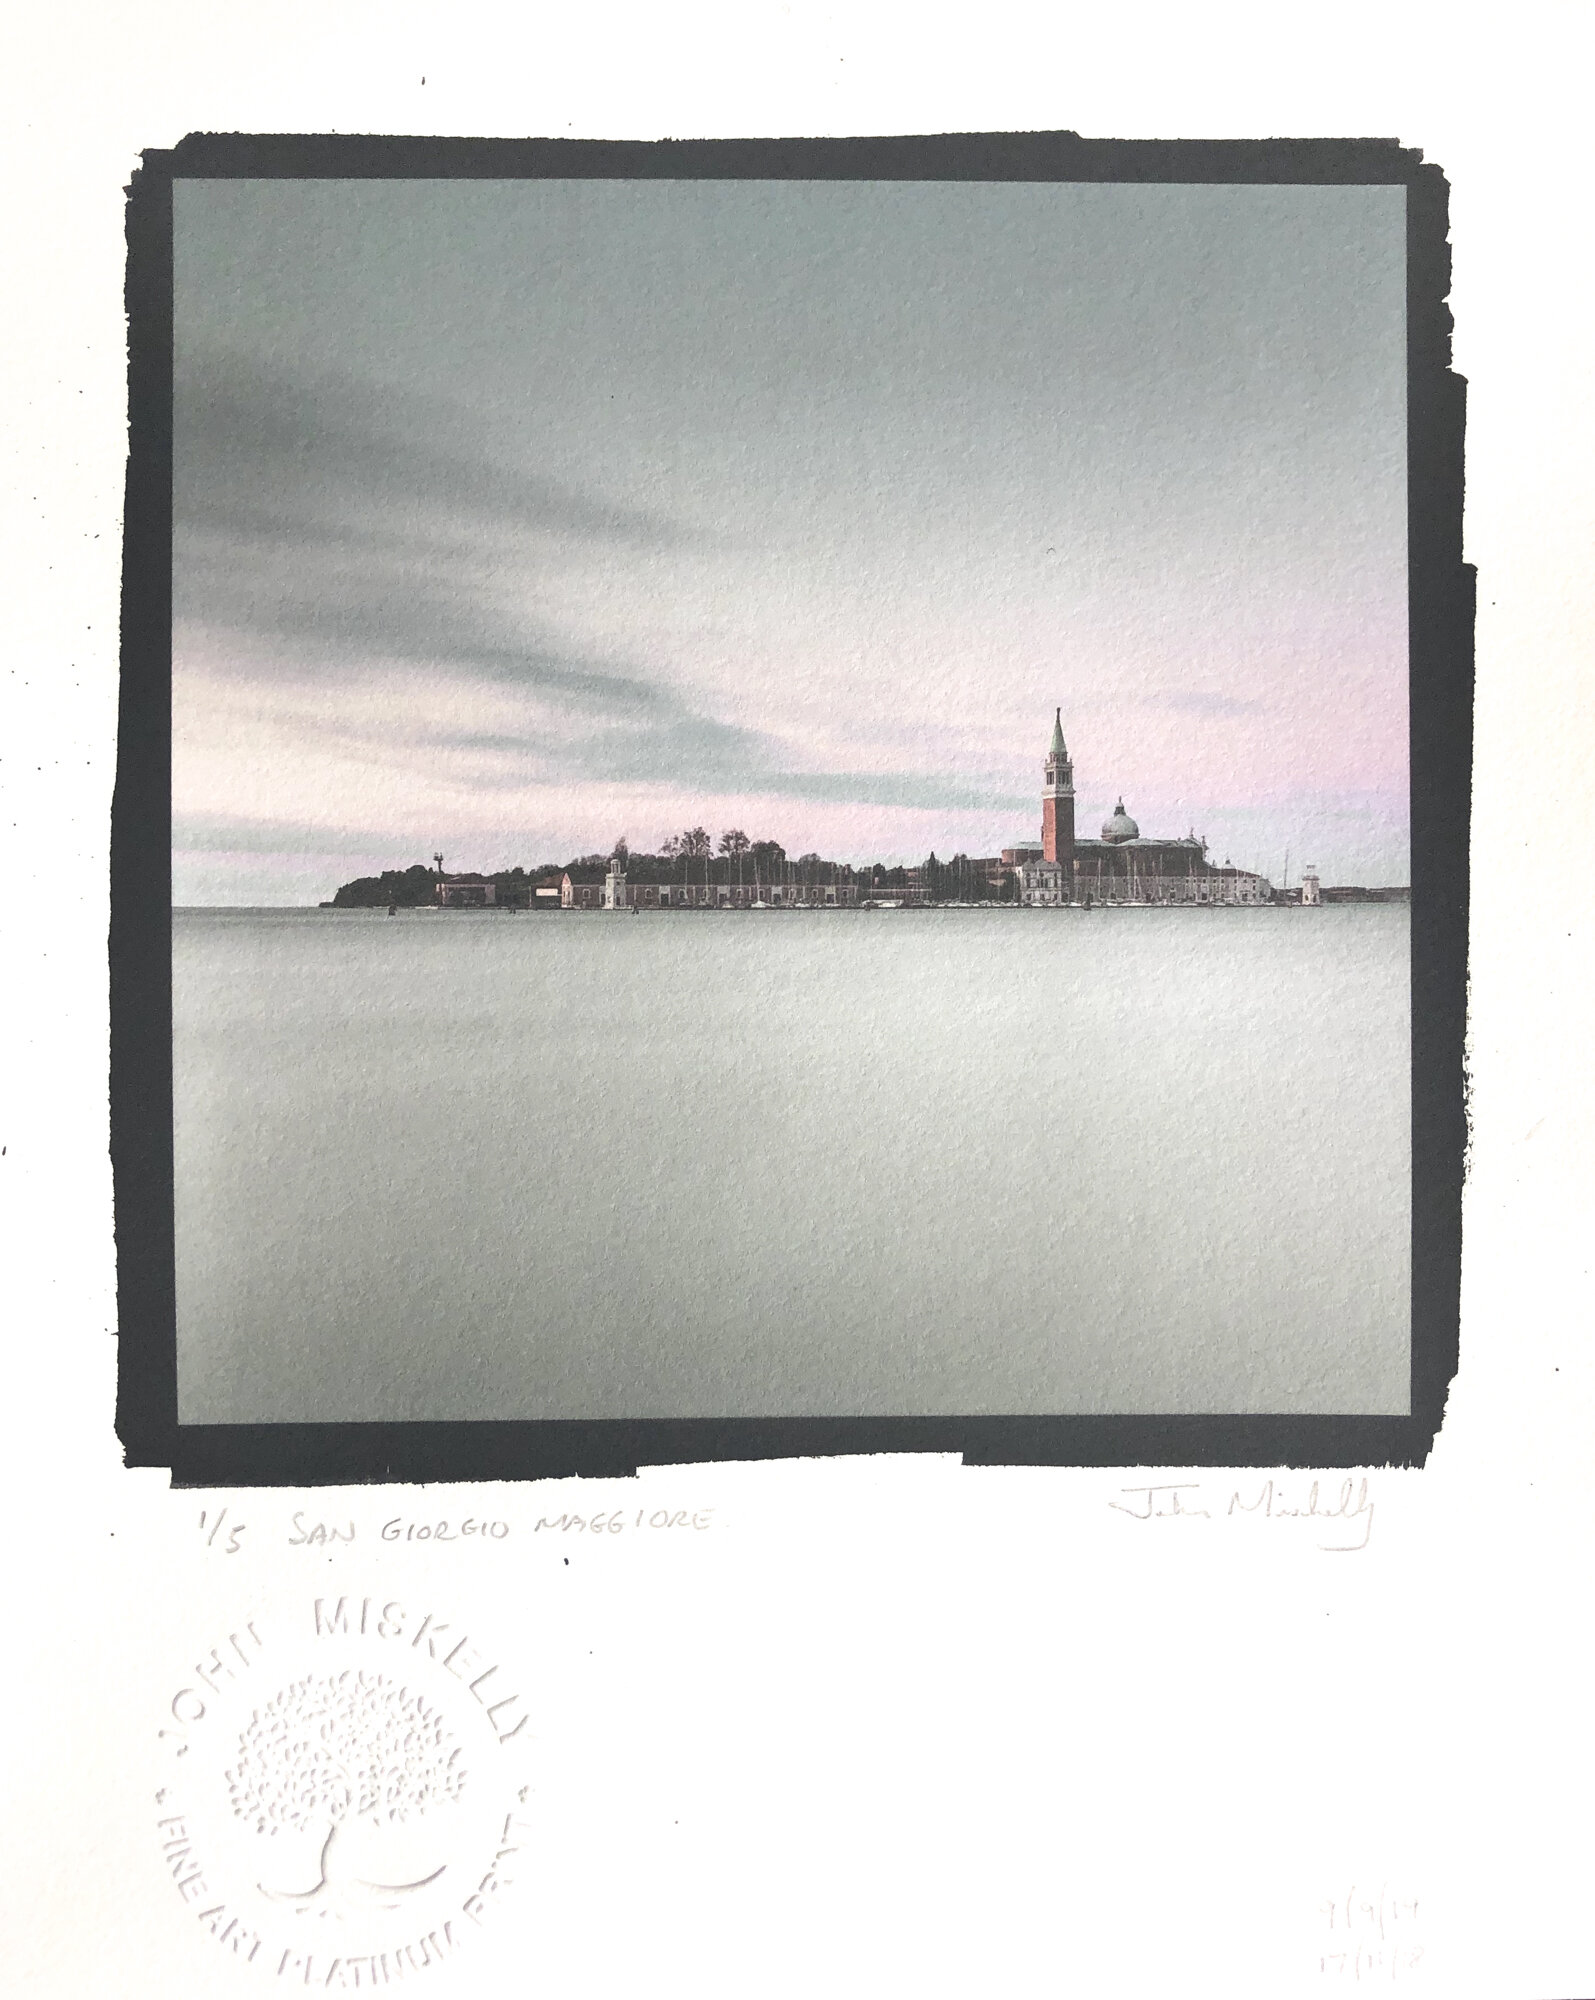
Platinum/palladium print with colour.
While I have been particularly busy recently, I believe that the experiments with the new process can be refreshing in a creative sense and this is something I recommend to everyone involved in creative endeavours. You may well not go to quite the extent of investigating one of the historical processes, but I recommend trying something different to reinvigorate those creative juices.
It could be as simple as photographing something you don’t normally do, a different genre of photography, or shooting only in black and white if you normally shoot in colour. Maybe try something totally different like pottery or drawing. So long as you ‘push’ your boundaries, I believe you’ll find new enthusiasm and creativity in the process.
I’m really privileged to be able to share my photographic journey with all of you and also to meet so many of you at my workshops and talks. Please let me know if there’s anything you would particularly like to see in this newsletter and I’ll do my best to use this information to make the newsletter as relevant as possible.
Until next time